How to add a Mini USB connector to your DS Lite.
Additionally there are cables available that do basically the same thing. Plus you don't need to open up your DS.
Proceed at your own risk!Intro
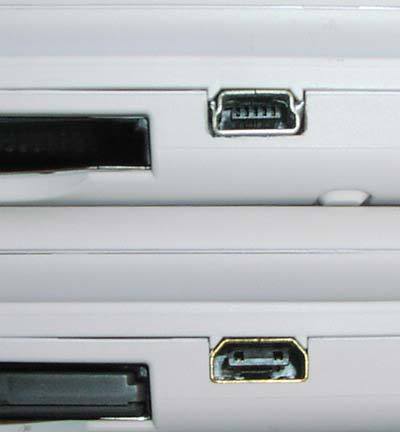
I've been noticing more and more consumer gadgets(Phones/MP3 players) are making use of a Mini USB plugs connect to their charger. I figured why not try adding it to my DS Lite. As it turns out it's a fairly straight forward hack as the pinout and spacing are almost identical between the two connectors.
Parts/Tools Needed
Replacing the DS Lite power connector a Mini usb connector is actually quite easy, assuming you have the correct tools and the correct parts.
Parts:- 1 Nintendo DS Lite
- Willingness to scarifies your DS in the name of convenience
- 1 Mini USB 5 Position Surface Mount Connector.
Here's one from Digikey but they available else where: UX60-MB-5S8
- Small Phillips head screw driver
- Security Tri-wing bit/screw driver [Example]
- An exacto knife (or something equally thin and stiff)
- soldering iron
- Soddering Wick And/Or solder Sucker
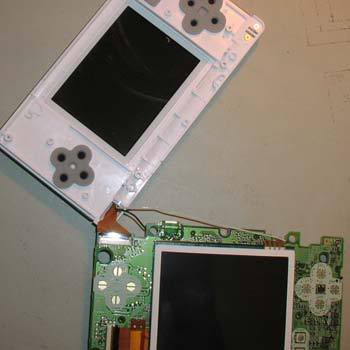
Disassembling your DS Lite
Let's take a look at the back of the DS Lite. First remove the battery cover and take out the battery. You should have something that looks like this:
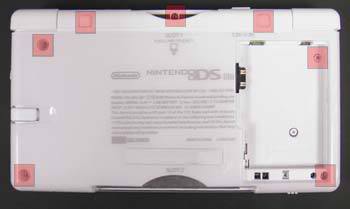
There are 7 screws that need to be removed. 4 that are security bit type and 3 are standard phillips screws. All but two should be readily visible. The two hidden ones are underneath the rubber feet near the shoulder buttons. Take an exacto knife and you should be able to pry those off with minimal damage.
After those are out gently pull the bottom casing up from the rest of the DS. It won't come off easily so you'll have to pry it off gently.
Next we have to remove the shoulder buttons. Be careful they have little springs in them that could be lost easily if you drop them.
Finally we can remove the two screws holding the PC board to the casing.
Replacing Connector
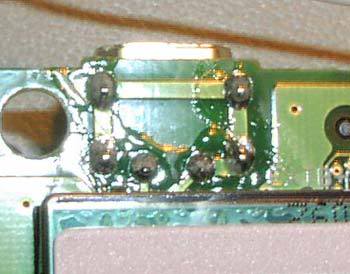
Now we can finally see what we're up against:
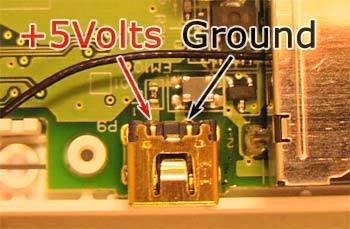
And if we compare this pinout to the pinout of a mini usb plug we can see that it's the same. +5V on the left pin and Ground on right pin.
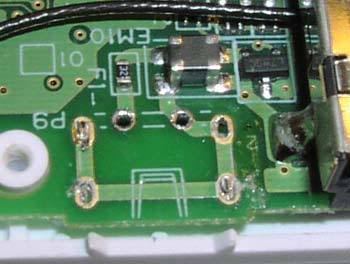
Next lets flip the DS PC board so we have access to the solder side of the connector.
Start desoldering the connector. In most cases it would probably be the easiest to simply cut the pins free and then worry about removing the solder. I ended up giving up after getting the two power pins free and cut the rest of the pins to remove the part. Be careful to not put too much heat on the board as it could damage it.
Once your done it will look like this.
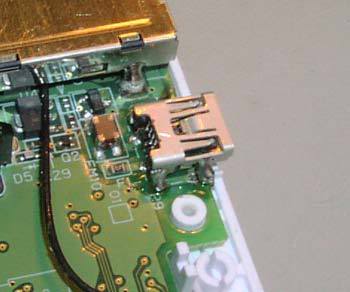
Now we'll need the usb connector. Bend the inner 3 pins up and cut them off as we won't be using them. The part I used as a surface-mount as I assume most will be. So I bent pins 1 and 5 down so the surface-mount pins entered the solder through holes. The part I used also had solder legs and positioning posts. The solder legs I bent to the sides to use a feet to solder too and the positioning post(little plastic nubs underneath the connector) I simply cut off.
Once everything is ready to go take some time to line up the part because once you solder it down it will be hard to re position. I found it easiest to solder from the top side. Just set the part in place, heat it up and touch some solder to it.
If everything goes well it should look something like this.
At this point if you'd like you can check for continuity. But if you were pretty clean with your soldering there should be nothing to worry about.
From here you are basically done. One other step I took was to shave a little bit off the bottom case where it touches the connector as it was a little snug but I'm not sure that is necessary.
Reassembling
Pretty much as this point just do everything you did to take it apart. Just a few things to note.
Watch the wifi antenna wiring. Make sure the white wire that runs under neath the board it tucked back into it's groove neatly. And make sure to route the black cable out of the way of the bottom case and the shoulder pad as you close the case.
Also the shoulder button springs can be a bit annoying, but a good pair of tweezers will help with getting them back in.
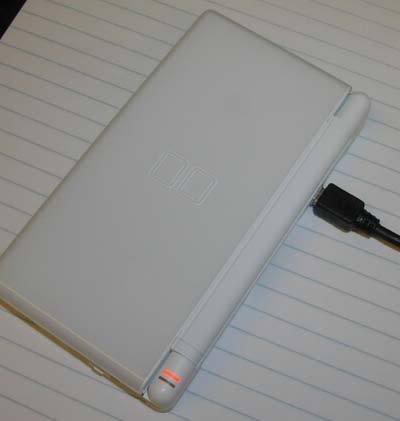
And now some pictures.